So now that I have made terms with it, talked to friends about it, I am ready to talk about it and turn it into something good. After you read this, no matter your age or coloring, I want you to schedule an appointment with a Dermatologist and get checked. Just in case.
I am sorry to everyone who I have been flighty with, or forgetful, or hurried. My mind has been elsewhere. On this, more specifically.
On May 8, 2014 I went into my Dermatologist Office to hear about my biopsies from the previous week at my annual appointment. I wasn't too concerned, I go to see her every year and she always takes a few things to send to the lab. I just figured she was calling me the office because of some new privacy law. Nope. She called me there to tell me the mole she removed from my left hand, the one I had since I was a child, had developed into Melanoma. She handed me a pathology report, a book called Understanding Melanoma, then proceeded to pull out her pen and say she wanted to take a few more samples. These samples included one on my foot, which made it hard to walk for days after, and one on my face, which just sucked.
She also told me to wait for a call from a surgeon they were setting me up with, I would need a wide local excision, a lymph node biopsy, and because it is on my hand a skin graft.
This was the day before I was to go camping with my girl scout troop. Needless to say, I owe a debt of gratitude to the other 2 leaders who went with me, because I was in a complete daze and unable to walk much. I know my girls still had fun, even though I think I forgot half of the activities I had planned.
The just of the pathology report is that it is Melanoma 2TA, 1.1 on the Breslow Scale, mitotic index of 4. It was in the dermis.
I started researching and reading, but was pretty freaked out. Cancer. How many people get cancer? Did I know anyone who had skin cancer? What would surgery be like? I am left handed. How will I do anything during recovery? How will I take care of my kids? The house? Work? MY GOD HOW WILL I SEW??
I met with my surgeon this past Friday, and feel OK about everything after talking to him. Sometime next week I will go in for a test to see which lymph nodes it could spread to for the biopsy, then they will schedule surgery for sometime in the next week or so. However, after surgery I will not be able to use my left hand for 3 to 6 weeks. They will take a silver dollar size chunk out of my hand to make sure all the cancer is gone then take a skin graft from somewhere else on my body to cover my hand, probably my thigh. Yeah fun!
So now we are trying to figure out how to deal with the aftermath of the surgery. We had to cancel our summer plans of travel, and I am frantically trying to finish projects I was working before I can't sew or do much of anything. But I am grateful. Grateful that this is all I will probably have to go through. Chemo and radiation is probably not needed, because it was caught early, because I go every year to get checked.
I can also say that there was no noticeable change in the mole. She took it because it looked puffier, but I didn't notice. it could have been any mole. I never used a tanning bed, however like most people my age I spent all day outside as a child. I can remember being sunburned once.
Now that you have read this, thank you. It helps me cope better being able to share. Make an appointment to get checked. Melanoma's are on the rise.
Saturday, May 17, 2014


Como, Mississippi
Yesterday we went to Como for an evening out to celebrate my 40th birthday. I know, we are so close to a hot spot like Memphis, why chose to travel farther south to Como?

The Como Steakhouse of Course! Well, that and the town of Como is charming. One of the things I love about Mississippi is that every town has a story. Several in fact. If you find yourself traveling through Mississippi, especially a meandering road trip (which I think everyone needs to do), find Como and stop for a spell. Meet some locals. Have the best steak of your life. I am not kidding. The sides at Como Steak House are nothing spectacular. But the meat is the most amazing steaks you will ever eat. Ever.

The town itself is small.After you exit from 55 you take what looks like it should be the main road to town, but Main Street itself is a little turn off right by the railroad tracks. I love architecture of Main Street.

Even the former City Hall Building has been left to grace Main Street.

There are three Blues Trail Markers in Como, but I will let you discover them for yourself.

When you are done eating and seeing what is town, take a drive around the area and check out some of the older homes. Gorgeous.
Friday, May 16, 2014
How to chose your long-arm quilter
While doing the binding on a quilt I recently picked up from my long-arm quilter, Teresa, I started thinking of the one thing I dread doing when we move to a new area. That is finding a long-arm quilter I like! When we were in Franklin I had established a rapport with a local woman who did amazing work, and took my tops there. Here it took me a while to find another long-arm quilter, and now I use her for everything. I was thinking of what I needed in a long-arm quilter, and what you should look for too!
Firstly, everyone has a different aesthetic. I am a patch-worky-modern-meets-tradition-kind-of-lets-see-what-happens kind of quilter. I don't do applique. I love the look of it, don't get me wrong, but when I am in my studio I have to be true to myself. So rule one is: Make sure your aesthetics jive. They can be an amazing quilter and have 40 years experience, but if you are both not on the same page design wise, you won't be happy as a customer and they won't be happy with the work they did on your quilt. I will admit when I take my quilts to Teresa, I tell her to do what she thinks will work best, because after 4 years I know we are on the same page and I will LOVE what she does. Along with everyone having different aesthetics, everyone has different experience. For most of my quilting, I want edge to edge. My quilter has a ton of pantos to chose from.
The quilting will add life and movement to your quilt, and yes, it can also kill it. When I first started quilting 10 odd years ago, I went to a lady because she was cheapest. It's not that they look bad, but they could look better. I have 1 bed quilt I made that has a meander quilting on it and the spaces are about the size of Texas. I also chose cheap batting for that one, which is a whole separate blog post.

We all make mistakes while piecing, and I know that things can be "quilted out", so you don't notice your mistake. You know what else I found out? Things can also be quilted worse, and the mistakes can be highlighted.
So, look at their sample work. Check out their webpage, blog, etc. Talk to their other customers. Talk to them. I chose my quilter out of the 20-odd ones that work locally. I know all the local long-arm quilters do amazing work in their own right, but I chose the one who matched me the best!
Second, you should be able to talk to your long-arm quilter. Really talk. And listen. Trust. You hand over your tops, that you have spent a lot of money and time on. Did you sit down and let them know your vision? I think it is better to go in and tell what your overall desire is for the quilt, then pick the quilting design together, than to walk in there and say "I want this pattern with this thread and that's it!". But on the other hand, you should have some idea, if not concrete than conceptual, of what you want from them! Even if you just tell them your inspiration.

Sew, if you are newer to quilting or just looking for a new long-arm quilter, keep this in mind! Ask others for recommendations. Check out photos of their work, and most importantly, talk to a few!!
Happy Sewing!
-p-
Firstly, everyone has a different aesthetic. I am a patch-worky-modern-meets-tradition-kind-of-lets-see-what-happens kind of quilter. I don't do applique. I love the look of it, don't get me wrong, but when I am in my studio I have to be true to myself. So rule one is: Make sure your aesthetics jive. They can be an amazing quilter and have 40 years experience, but if you are both not on the same page design wise, you won't be happy as a customer and they won't be happy with the work they did on your quilt. I will admit when I take my quilts to Teresa, I tell her to do what she thinks will work best, because after 4 years I know we are on the same page and I will LOVE what she does. Along with everyone having different aesthetics, everyone has different experience. For most of my quilting, I want edge to edge. My quilter has a ton of pantos to chose from.
The quilting will add life and movement to your quilt, and yes, it can also kill it. When I first started quilting 10 odd years ago, I went to a lady because she was cheapest. It's not that they look bad, but they could look better. I have 1 bed quilt I made that has a meander quilting on it and the spaces are about the size of Texas. I also chose cheap batting for that one, which is a whole separate blog post.
Quilting by Quilts2aT Studio.
We all make mistakes while piecing, and I know that things can be "quilted out", so you don't notice your mistake. You know what else I found out? Things can also be quilted worse, and the mistakes can be highlighted.
So, look at their sample work. Check out their webpage, blog, etc. Talk to their other customers. Talk to them. I chose my quilter out of the 20-odd ones that work locally. I know all the local long-arm quilters do amazing work in their own right, but I chose the one who matched me the best!
Second, you should be able to talk to your long-arm quilter. Really talk. And listen. Trust. You hand over your tops, that you have spent a lot of money and time on. Did you sit down and let them know your vision? I think it is better to go in and tell what your overall desire is for the quilt, then pick the quilting design together, than to walk in there and say "I want this pattern with this thread and that's it!". But on the other hand, you should have some idea, if not concrete than conceptual, of what you want from them! Even if you just tell them your inspiration.
Evie with Teresa from Quilts2aT Studio. Evie has finished 2 quilts and loves to visit Teresa's studio!
Price. I would say don't worry about price, but know about what you will owe before you leave from dropping it off. I will also say if your quilter buys batting in bulk, check out their batting. I buy batting from my quilter because she carries higher quality batting.
Another question to ask is what is the turn around time. Don't be shocked if it is up to 2 months! I would also say relax about time, you don't want them to do a rush job. So if you are doing a gift, make sure to leave enough time for the quilting!
Sew, if you are newer to quilting or just looking for a new long-arm quilter, keep this in mind! Ask others for recommendations. Check out photos of their work, and most importantly, talk to a few!!
Happy Sewing!
-p-
Thursday, May 15, 2014
The Weighted Blanket Project
I wish I could convince myself to blog half as much as I sew! I have been super busy since January but haven't taken the time to write about anything. The first big project is I was able to sucker, I mean convince some ladies from my quilt guild into making weighted blankets to donate to area children. We have a sew in about every three months, and at our end of February Sew in, Henry Bailey with The Commercial Appeal stopped by and wrote a nice article that ran in the Subday paper, was picked up by The AP and ran in papers across the country, including The Washington Times.


How cool is that? We have been able to keep going because of donations from area churches and people. We have given over 100 blankets and lap pads to area children. We have also received letters from people all over the country who have seen Henry's article! They have asked how to start a group in their area, so I hope to hear that other groups are starting up all over.
Quilters have big hearts. I know this. Every guild I have been apart of has had three or four charities they adopt and work with. They use their talents to bring comfort and warmth to those in need, and I am so glad to be a part of The Weighted Blanket Project. As a mom of The Amazing AspieGirl, I know how much these blankets mean to both the children and the families. Thanks again ladies! See you all on Monday for our next Sew In!
Thursday, April 24, 2014
The Midtown

It's here! My new PDF pattern is available on etsy and craftsy as a downloadable PDF file! This sample bag was made using Jenean Morrison's new fabric line Lovelorn. I am so in love with this collection!
The Midtown was inspired by working in Memphis Midtown at Sew Memphis, and just getting to hang out and shop. My little man is now potty trained, and after spending what feels like an eternity carrying large bags filled with diapers and pull ups and extra clothes and enough snacks to be stranded in Death Valley and not starve or dehydrate, I find myself in a position to just carry what I need, my wallet, my phone, sunglasses and a few small items. I also like to have my hands free, since little man is still 3 and sometimes likes to be chased! So here is my life right now. It's cute, it's hip, its a nice sized crossbody with a zippered pocket front and an open pocket in the back.

The inside boasts pockets along the back side and the two zippers are super easy to install!

It is with a heavy heart I give up my "baby bag" days, knowing that he is our last baby. This style of bag is one I would have loved in my 20s, and have found a new appreciation for it in my 40s!
The above sample actually was for Jenean, it was just sew pretty I had to use it for all the pictures in the pattern! I can't wait to see what others do with this pattern! I have already made one for myself, of course I used my stash of Star Trek fabric.

So if you see this bag in midtown Memphis, stop and say hi!
Tuesday, October 22, 2013
Four Coins for the Wishing Well
Free Pattern!
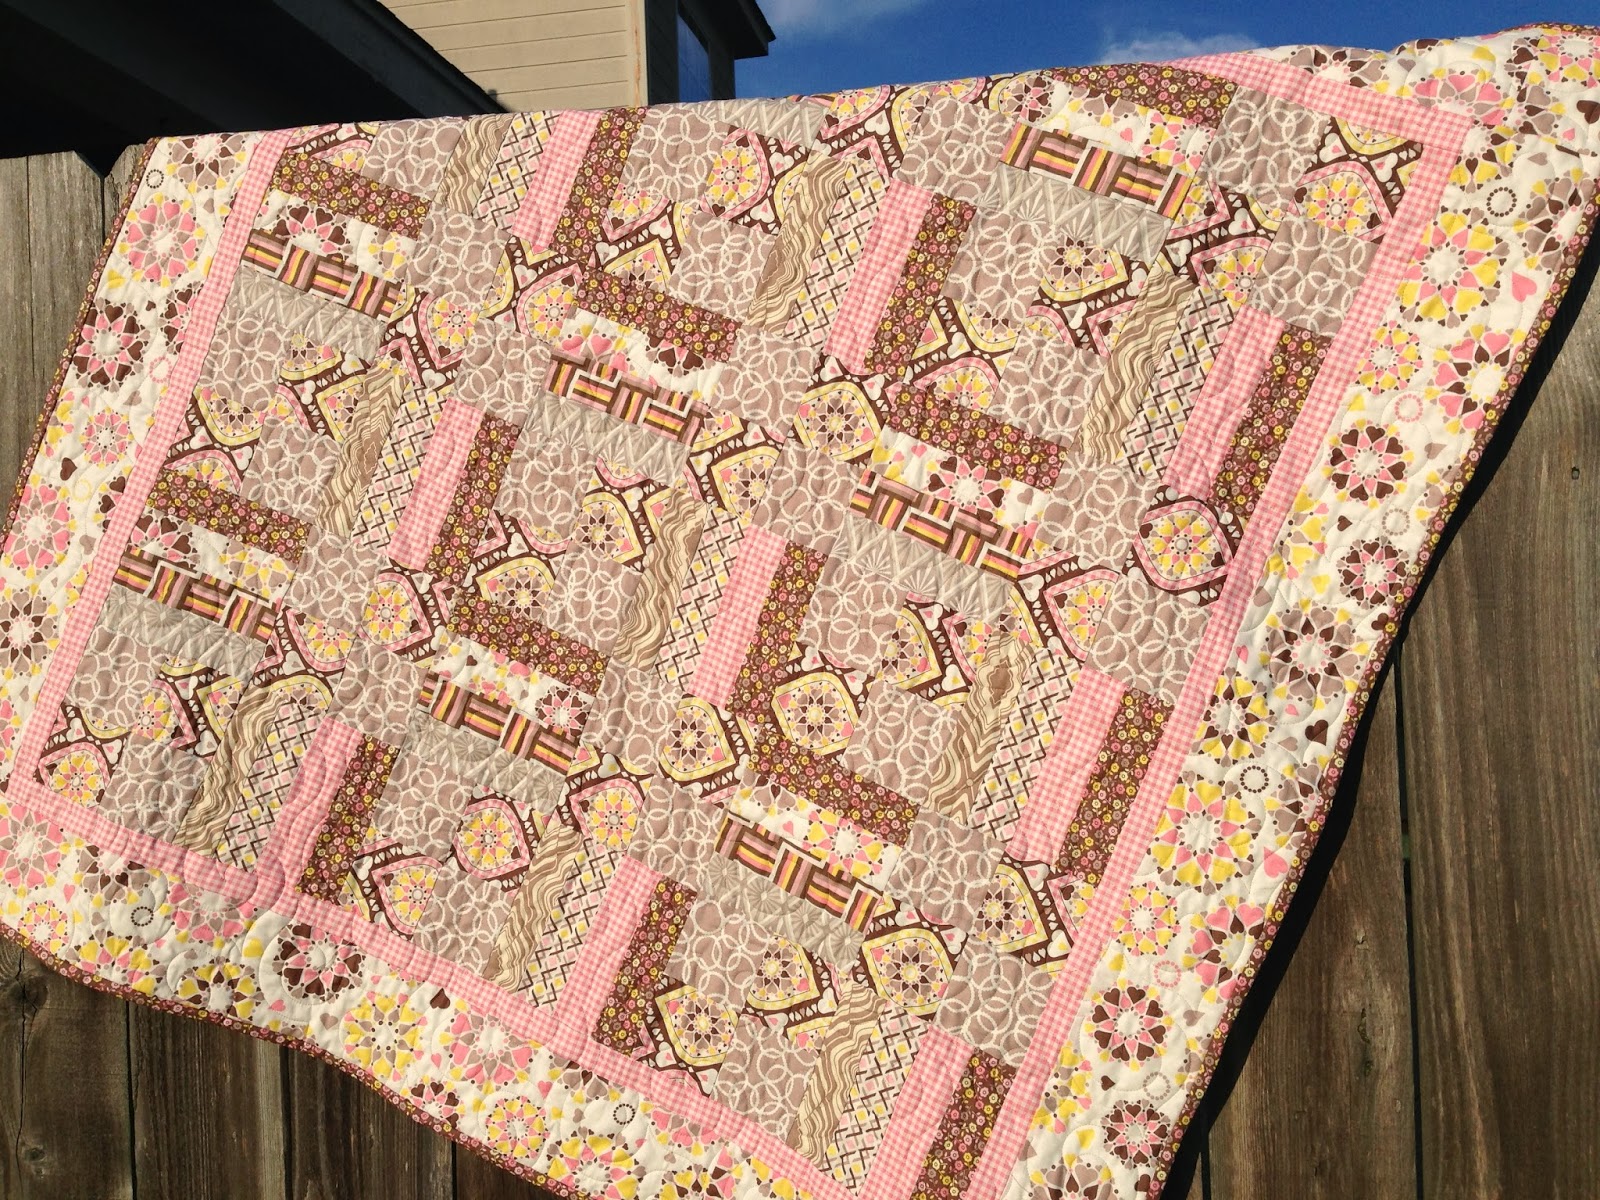
I was asked to make a few items for quilt market by one of my favorite fabric designers, Jenean Morrison! She has a line with Free Spirit Fabrics, and her new line is Wishing Well. I only had a few days to come up with a plan, and the fabrics inspired my to make this, Four Coins for the Wishing Well. The line is GORGEOUS. there are some small prints and ginghams that have a sugar sack feel, mixed with bold beautiful prints to bring together vintage and modern in one cohesive line. I am so in love with these fabrics! So I took a basic 4 patch and rail fence to mix up and give it a cuddle quilt feel.


I was asked to make a few items for quilt market by one of my favorite fabric designers, Jenean Morrison! She has a line with Free Spirit Fabrics, and her new line is Wishing Well. I only had a few days to come up with a plan, and the fabrics inspired my to make this, Four Coins for the Wishing Well. The line is GORGEOUS. there are some small prints and ginghams that have a sugar sack feel, mixed with bold beautiful prints to bring together vintage and modern in one cohesive line. I am so in love with these fabrics! So I took a basic 4 patch and rail fence to mix up and give it a cuddle quilt feel.
Four coins for the
Wishing Well
Designed specifically
for use with Jenean Morrison’s Wishing Well Fabrics available now from Free
Spirit
Finished size
46 by 46
Fabric
For 4 patch
3/8 yard each
3/8 yard each
PWJM093 -Ring Around
PWJM089-Kiss and Tell
For Rail Fence
1 fat quarter each
PWJM091 -Floral ditzy
PWJM096-Gingham
PWJM017-Diamond
PWJM095-Secret Hearts
PWJM092-Diamond Geo
PWJM904-Ladder Stripe
071-Pillow Fort
¼ yard PWJM090-Chirp inner border, you can use one from
another color line
½ yard PWJM095-Secret Hearts for the large border

Cut your 4 patch fabrics into 3 ½ inch strips, piece
those strips then cut down to 3 ½ again, then piece those to a four patch. You
need 18 total 4 patch blocks.
Cut your Rail Fence Fabrics into 2 inch strips. You will
use about half of each FQ for the blocks, the rest you can save for the
binding. You will use almost all of your Floral Ditzy.
Cut 4 -1½ inch strips from the small border fabric.
Cut 5 - 4 ½ inch strips from your outside border fabric.
There are two rail fence blocks, but for each Floral
Ditzy is the first edge fabric. Piece the strips together, then cut into 6 ½
inch blocks. You need 9 of each.
Assemble the big blocks like the photo, with a 4 patch, then
vertical rail fence. Second row is horizontal rail fence then a 4 patch.
Assemble the blocks in 3 rows of 3, add small border then
larger! Sew easy!
©SFNC 2013. For personal use only.
http://southernfriednorthernchic.blogspot.com
http://www.facebook.com/SouthernFriedNorthernChic
Monday, August 5, 2013
Weighted Blanket
Hi ya'll! as you know, my daughter Serena was diagnosed with Asperger's Syndrome last year. It has been a hard road, but with therapy we have come a long way. As a sewist, I have been able to make items for her use, including the miracle that is the weighted blanket. Any child with Sensory Issues (and adults, I love her weighted blanket, it is relaxing!) can benefit from one. See, Serena had major sleep issues. She would not settle down and night, and would wake a few times at night and wake us a few times a night. So her therapist recommended a weighted blanket, and OMG we are now a sleeping house! I made ours, which is more affordable, and now have a group of wonderful women in my Local Quilt Guild making them for children in our county! Our biggest expense are the poly pellets. I order poly pellets online, and have found a seller on eBay who does free shipping at the best prices.
Anyway, here is a quick tutorial on how we are making them. They really are a necessity for children with Sensory issues, and sometimes are priced out of a family's reach, since they are not covered by most insurances.
First, ask your therapist what weight for the child. Most do 10% of the child's weight, but a few children have been recommended less, and a few more.
Next, chose your fabric. This blanket is for a 7 year old girl, so I have 2 cuts of a yard and a quarter fabric.
This will make sense to quilters, if you are not a quilter someone at your local fabric store can help you! You need to square up your pieces, but also make sure they are exactly the same length. I do this by laying them on top of each other after they are pressed and folded. I have to use a bit more pressure with my rotary cutter, but it is worth it!

Next, you open the folded pieces and make sure they are the same width, since all fabrics are a little different. To cut the Salvage edge, I open so the salvages are together for both fabrics, the refold so I can cut them on the mat, like you would if you were cutting sashing from a directional print!

Just be really careful to get the folded sides lined up together.

 Then trim the salvage ends even! Sew simple!
Put fabrics pretty side to pretty side (right sides together) and stitch the sides and bottom, leaving the top open for the poly pellets!
 I press it at this point so the seams are nice and it is flat, because now we take it to our cutting table to measure out the squares!
Measure the width of your blanket. If it is divisible (or close) by 4 or 5 or 6, you have your square size! I like to aim for 5, which this one is!

Fold in half and press. e will use the center mark to start. Then measure the half length to double check your square size. Not all squares have to be perfect, some might be a quarter inch off because of the width, that's OK!

My squares will be 5 inches, so I open my fabric and start with marking the center crease. Then I measure 5 inches from that line on each side, and continue until all my vertical lines are done!

Then, starting at the bottom, measure up 5 inches, and create your horizontal marks. Keep going until you have only about 6 inches left at the top. See, they are 5 inches apart!

It is REALLY important to leave room at the top. You are working with heavy beads, and need the extra room for the last row. If not, they will just all spill out!!!
Next we are going to sew our Vertical lines. I also seam the sides and bottom, but the sides only to your last marking at the top, because you will stop there and create your folded edge later.
For each seam, start at the bottom, reinforce with a few back stitches, and go only to the last marked line, so there will be about 6 inches at the top!

When all lines are sewn, you are ready to measure out the poly pellets and fill. Oh this is fun! First, break out either a mailing scale or a food scale.
Measure the weight of the beads you need. This was a 6 lb, but I have pellets in 4 lb bags, so Here is my first bag!

Now you have to figure out how much each square needs. convert pounds to ounces, and then count your squares. I had 72 squares, so 6 pounds is 96 ounces divided by 72 squares, each square needs 1.33 ounces of pellets!
Grab a bathroom cup or small cup (this is a top from a shaving cream can), zero your scale for it, and measure your per square pellet amount.

Measure out the amount for one square to see where it is at your cup. My cap has ridges, so I know that at approximately the second ring from the top is the amount I need. If I was using a paper cup, I would draw a line with a sharpie. Then start filling the pellets into the channels! Put the same amount in each channel all the way across, then sew your horizontal lines. This gets tricky, you have to shake all the beads to the bottom of the pockets, then keep the weight of the pellets on your sewing table so it won't pull, and use your hands to keep the pellets very far away from your needle!

I sew with the pellets to the left of the machine, carefully moving the pellets left away from the needle. I also use my walking foot.

Continue this until your last row. It will start to be a struggle and be really heavy! The best advice I can give you is go slow. sew the last horizontal line, making sure you cross your vertical seams! then take it to the cutting table and cut the extra off, leaving about an inch or so to turn in on itself to create a finished edge.

Pin and sew! I sew at a few spots.

First close to the edge, then once down the center.

All done! feel free to contact me if you have any questions! Happy Sewing!
Anyway, here is a quick tutorial on how we are making them. They really are a necessity for children with Sensory issues, and sometimes are priced out of a family's reach, since they are not covered by most insurances.
First, ask your therapist what weight for the child. Most do 10% of the child's weight, but a few children have been recommended less, and a few more.
Next, chose your fabric. This blanket is for a 7 year old girl, so I have 2 cuts of a yard and a quarter fabric.
This will make sense to quilters, if you are not a quilter someone at your local fabric store can help you! You need to square up your pieces, but also make sure they are exactly the same length. I do this by laying them on top of each other after they are pressed and folded. I have to use a bit more pressure with my rotary cutter, but it is worth it!

Next, you open the folded pieces and make sure they are the same width, since all fabrics are a little different. To cut the Salvage edge, I open so the salvages are together for both fabrics, the refold so I can cut them on the mat, like you would if you were cutting sashing from a directional print!

Just be really careful to get the folded sides lined up together.


Put fabrics pretty side to pretty side (right sides together) and stitch the sides and bottom, leaving the top open for the poly pellets!

Measure the width of your blanket. If it is divisible (or close) by 4 or 5 or 6, you have your square size! I like to aim for 5, which this one is!

Fold in half and press. e will use the center mark to start. Then measure the half length to double check your square size. Not all squares have to be perfect, some might be a quarter inch off because of the width, that's OK!

My squares will be 5 inches, so I open my fabric and start with marking the center crease. Then I measure 5 inches from that line on each side, and continue until all my vertical lines are done!

Then, starting at the bottom, measure up 5 inches, and create your horizontal marks. Keep going until you have only about 6 inches left at the top. See, they are 5 inches apart!

It is REALLY important to leave room at the top. You are working with heavy beads, and need the extra room for the last row. If not, they will just all spill out!!!
Next we are going to sew our Vertical lines. I also seam the sides and bottom, but the sides only to your last marking at the top, because you will stop there and create your folded edge later.
For each seam, start at the bottom, reinforce with a few back stitches, and go only to the last marked line, so there will be about 6 inches at the top!

When all lines are sewn, you are ready to measure out the poly pellets and fill. Oh this is fun! First, break out either a mailing scale or a food scale.
Measure the weight of the beads you need. This was a 6 lb, but I have pellets in 4 lb bags, so Here is my first bag!

Now you have to figure out how much each square needs. convert pounds to ounces, and then count your squares. I had 72 squares, so 6 pounds is 96 ounces divided by 72 squares, each square needs 1.33 ounces of pellets!
Grab a bathroom cup or small cup (this is a top from a shaving cream can), zero your scale for it, and measure your per square pellet amount.

Measure out the amount for one square to see where it is at your cup. My cap has ridges, so I know that at approximately the second ring from the top is the amount I need. If I was using a paper cup, I would draw a line with a sharpie. Then start filling the pellets into the channels! Put the same amount in each channel all the way across, then sew your horizontal lines. This gets tricky, you have to shake all the beads to the bottom of the pockets, then keep the weight of the pellets on your sewing table so it won't pull, and use your hands to keep the pellets very far away from your needle!

I sew with the pellets to the left of the machine, carefully moving the pellets left away from the needle. I also use my walking foot.

Continue this until your last row. It will start to be a struggle and be really heavy! The best advice I can give you is go slow. sew the last horizontal line, making sure you cross your vertical seams! then take it to the cutting table and cut the extra off, leaving about an inch or so to turn in on itself to create a finished edge.

Pin and sew! I sew at a few spots.

First close to the edge, then once down the center.

All done! feel free to contact me if you have any questions! Happy Sewing!
Subscribe to:
Posts (Atom)